Pages


Tuesday, September 6, 2011

Stawberry Sorbet


Instructions for the most delicious strawberry sorbet


Move to Oregon, where you can partake of the unrivaled flavor of Hood berries

Move in next door to a wonderful neighbor who likes to cook

Grow your own lettuce and herbs and cut a big bundle to give to said neighbor

Accept homemade strawberry sorbet in return, with profuse thanks

Scoop into pretty white bowls, garnish if desired, and serve with a tiny spoon

Sorry, everyone, this is the only way I know how to “make” strawberry sorbet. If any of you has a good recipe……I would be happy to offer you some lettuce or other garden-fresh products in exchange for your sorbet :)

Friday, May 20, 2011

We all scream for ice-cream!

Aaah, sweet sunshine at last! Spring arrived in Portland a while ago, but although the birds were a-chirping and the buds were a-blooming, it hadn't really felt like winter had released its cold grey hold. Until this week, that is. Finally, we have seen a few days of uninterrupted sunshine, and both I and my garden are grateful for it. With sunshine, of course, comes many things – roses, picnics, trips to the beach, Vitamin D, and best of all, ice-cream. I have a theory that no one can be angry when they're eating ice-cream. It has the power of transporting us to a happy place, at least for the few moments while we relish the creamy, cold, sweetness before it starts to melt all over our hands and clothes. (Hmmm, I hope some of you can relate to this, because otherwise, I may just be a very messy ice-cream eater.)
I've wanted to write a post about ice-cream for a long, long time, especially after a recent trip to Italy which began and ended with cones of freshly-made gelato (and was heavily punctuated with more gelato in between, of course). In retrospect, almost every phase of my life has had a particular ice-cream "experience" associated with it.

Tartufo in Rome

When I was a graduate student at the University of Wisconsin, trips to the Babcock Hall Dairy Store was de rigueur in the summers. The trick to the summer ice-cream jaunts was to get to Babcock Hall before the kindergarteners arrived en masse. Once those little ice-cream eyed kids got in line before you, you knew that it would be well past an agonizing half hour before you got your hands on any "Union Utopia" or "Badger Brownie Blast".

As an undergraduate at the University of New Hampshire, we had a similar summer routine of weekly ice-cream trips to the UNH Dairy Bar. Situated at a quaint train station, which at the time was defunct, the Dairy Bar would serve up whopping portions of cool treats, all locally made at the University.

Growing up in Japan, the preferred summer cold treat was shaved ice. Now, I know what you're thinking, shaved ice is not ice-cream. Yes, I agree. But in the humid, 90-degree plus days of summer in Kobe, Japan, melon- and pineapple-flavored shaved ice was in many ways far better than ice-cream. I have countless memories of being saved by shaved ice during the summers of my teen years: lemon-flavored ice after swimming at the local recreation center; strawberry-flavored ice with friends after a window-shopping trip; coconut-flavored ice with my dad at the summer 'matsuri'. In fact, shaved ice is so popular in Japan that even in crowded cities, the shaved ice vendor would wind through the streets with his cart, loudly advertising his goodies. This brings me to my favorite ice-cream memories of all, the ones of my childhood in Bombay.

One of the most important experiences of summer holidays as a child was the utter boredom that inevitably came after the initial frenzy of unbridled joy. As I grow older, I find that I really miss having the time to be bored. Amidst the alternating joy and boredom of summer hols, one man would appear nightly in our neighborhood, giving us kids something to look forward to. No, not Wee Willie Winkie but the "kulfiwallah", or, literally translated, the 'kulfi'-man. (If I were a better artist, I could probably draw a pretty good replica of this man, since his image seems to be etched in my memory. But as it is, my drawing skills leave much to be desired, and I'm left with just my words to paint you a picture of those summer nights, instead.)

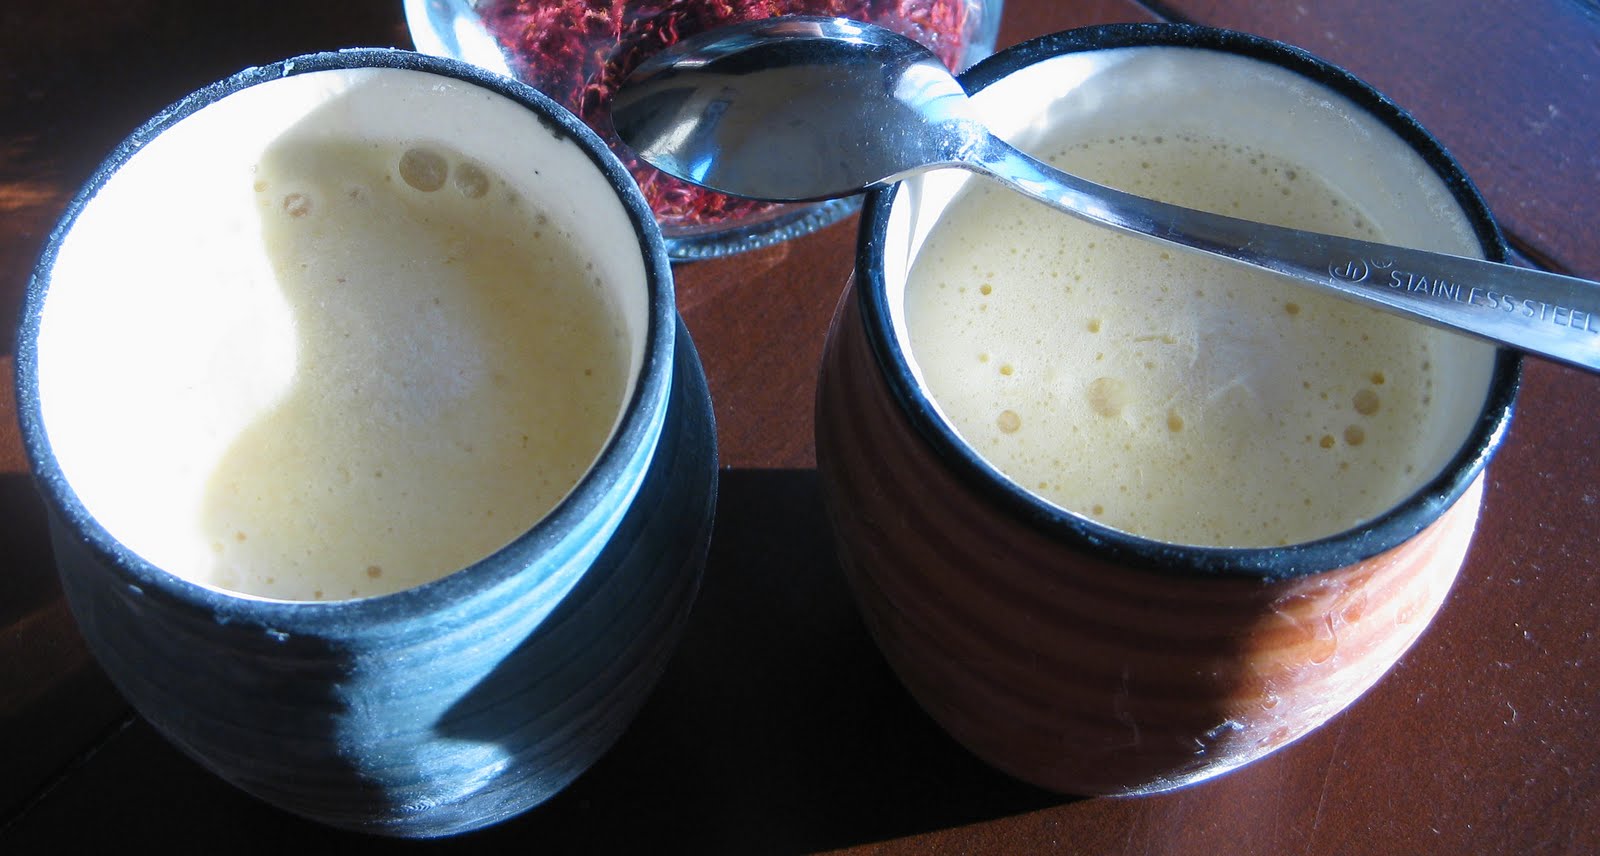
Kulfi (recipe follows below) is a type of Indian ice-cream that is made by slow-freezing a concoction of reduced milk and sugar, flavored with pistachios, cardamom, or saffron. The kulfiwallah of our neighborhood was an old man, wrinkled with age, his skin leathery from having walked around under the Bombay sun all day long. His voice was always hoarse, and on the brink of cracking, which, in my naïveté, I imagined was a result of eating too many kulfis. His cry of "kulfi-wallah" was to be heard quite frequently during the balmy summer nights. He would be dressed in loose-fitting pants and shirt that were once white, with a pointed white cap on his head. He carried on his head a huge straw basket covered with a damp red cloth, concealing dozens of sealed metal tubes. If you had been good and your parents decided to buy you some kulfi that day, he would set down his heavy load and pull out a metal tube, open it deftly with a long knife, and coax a perfectly molded kulfi out of it onto a leaf – I don't know what kind of leaf this was, but I'm sure my dad could remind me. He would then use his long knife to quickly cut up the kulfi into bite-sized pieces and hand it over into your eager hands, just as its edges started to melt in the summer heat.

Now, I'm very aware that we generally tend to romanticize memories of our past, but looking back on these memories, I still think that life doesn't really get better than treasured moments of eating ice-cream in the summer's heat! On this note, here's my recipe for making a kulfi-like ice-cream in a home ice-cream maker. You could also freeze this in popsicle-molds for a more authentic kulfi. Enjoy.

Kulfi

Ingredients

  • 1/2 gallon milk, plus 6 T warm milk -- I use skim milk, but you can use 2% or whole fat for a creamier taste
  • 1 can of condensed milk, plus more sugar to taste
  • 1/2 teaspoon ground green cardamom seeds1/4 cup coarsely ground pistachios or almonds (optional)
  • A few strands of saffron

Method


  • Place the saffron in 2T warm milk to extract the saffron flavor.
  • Dissolve corn starch in 4 T warm milk and set aside.Place the remaining milk in heavy wok or double boiler and bring to boil over medium-high heat, stirring continuously.
  • Reduce the heat and continue stirring and boiling until the milk is reduced a bit.
  • Using a method used in making Sicilian gelato, I next add the cornstarch mixture to the boiling milk and continue boiling for ~10 minutes, or until the mixture is thickened. This step cuts down the time needed to make kulfi considerably, and also lets me use skim milk in the recipe. However, the correct way of making kulfi would be to allow the milk to boil down to ~1/4 of its original volume.
  • Add the saffron. Taste the mixture, and add more sugar if you think you need it. Remember that foods taste sweeter when they are warm than when they are cooled.
  • Freeze in ice-cream maker according to instructions, or transfer to popsicle molds (or ice-cube trays) and freeze for at least 4 hours. (If using this latter freezing methods, dip your mold in hot water for about 5 seconds before attempting to free the kulfi.)
To serve, garnish with chopped nuts and a smile.


Friday, May 13, 2011

Jalapeño Beer Bread

I love my job for so many reasons. As a researcher, no two days are alike. Admittedly, there are tasks that can be routine, but apart from those necessary evils, I get to be pretty creative in designing ways to understand complex biological pathways with great relevance to human health. I also love that I get to listen to some of the best ongoing research, both at my own institute as well as from around the world. But most of all, I love working with my colleagues and mentors. I consider myself lucky to be in the company of so many brilliant scientists, many of whom have also become dear friends. Additionally, I have a hypothesis that many of the same qualities that make one a good scientist – attention to detail, precise note-keeping, being amenable to trial and error, and ultimately wanting to share your ideas and creations – are also the same qualities that make one a good cook. In light of this fact, and given my own laziness in updating this blog, I thought that I'd offer one of my multi-talented colleagues, Dr. Aaron Jacobs, the dubious honor of being the first guest blogger on Clean Platter. Aaron has brought in many delicacies to share with us, but the one that I request most frequently is his Jalapeño Beer bread. I once asked Aaron if this bread keeps well if made ahead of time, and his response was that he had never had a chance to test that out -- once you make a batch, it is generally rapidly devoured. I can say that I have had a chance to test this theory and have found it to hold up time and again!

So, without further ado, here's Aaron sharing with us his recipe for an absolutely delicious Jalapeño Beer Bread that's great for breakfast, lunch, dinner, or anytime in between.

~~~~~~~~~~~~~~~~~~~~~~~~~~~~~~~~~~~~~~~~~~~~~~~~~~~~~~~~~~~~~~~~~~~~~~~~~~~~~

Jalapeño Beer Bread by Aaron Jacobs

First off, I'd like to thank Harini for the chance to write a guest blog. I've enjoyed her friendship and her food long enough to be flattered when one of my recipes wins her approval. The recipe I'd like to share with you is "Les' Beer Bread." It was first shown to me during college, about ten years ago, by my good friend and roommate Les Fletcher. While I wouldn't say that I was a bad cook at the time, I was definitely afraid of cooking. We had a dining hall where the food wasn't THAT bad, and Les and I both had college-student- budgets that wouldn't allow for frivolous experimentation with food that might turn out worse than our meal plans. We found baking to be exceedingly unforgiving, and unless it was premade biscuits or frozen pizza, we rarely made use of our oven.

As our first year drew to a close we each found ourselves summer positions that were on campus, but didn't have meal plans. This meant our dining hall crutch was gone and we were on our own. As is often the case, there comes a point when you get tired of prepared foods and crave something from home. Since Les was from Texas, when he craved home-cooked food it had to either be barbecued or somehow flavored by beer. I'm not sure if his beer bread recipe came from his parents or if he developed it based on a loose childhood memory, but as soon as we tried it, we knew it was a hit.

The key is self-rising flour, which allows you to be as creative as you like without producing an inedible brick. This ended much of our angst over experimentation and made both of us much better cooks. (It also demonstrated for me the one invariable truth of baking- butter makes everything better.) I won't bore you with the details of adding goodies to the bread. It's great "as-is". It's even better with some herbs (choose your own adventure- I'll often do oregano/parsley). But it is fantastic with some cheddar and jalapeños. The beer brand doesn't matter and you will be just as successful with a Budweiser as a nice microbrew (although you DO need to figure out how to use the rest of your six-pack). The butter helps brown the crust nicely, and your unsuspecting recipients of the loaf won't know that the heel is the best part. (You can take a heel when you first cut the bread and you not only get the tastiest morsels, but you look humble and considerate to boot!) Just remember to share this loaf with several friends. I haven't done any calorie counting on the recipe, but it can't be healthy to eat more than a few slices, and it is highly addictive. Enjoy!

3 c. Self rising flour

1 can Beer (warm)

5 T. Sugar

¼ c. Butter

½ c. Cheddar (optional)

1 Jalapeño, diced (optional)

Herb medley (optional)

Preheat oven to 375. Grease a bread pan. Mix flour, beer, and sugar. Add any accessory ingredients- dough will be thick. Bake for 35 min (until lightly browned), then drizzle with melted butter and bake an additional 10 min. Let cool and pry out with a knife.

~~~~~~~~~~~~~~~~~~~~~~~~~~~~~~~~~~~~~~~~~~~~~~~~~~~~~~~~~~~~~~~~~~~~~~~~~~~~~

A few notes: If, like me, you don't have self-rising flour on hand, you can make your own by adding 1 1/2 teaspoons of baking powder and 1/2 teaspoon of salt to 1 C of all-purpose flour.

I recently made this bread with 1 C whole-wheat flour and 2 C all-purpose flour (with 41/2 tsp. baking powder and 11/2 tsp salt). This bread was slightly denser, but equally delicious.

I've generally used a mix of dried oregano, thyme, and sage as my herb medley. For a bit more heat, I also add some crushed red pepper flakes to the melted butter before drizzling it over the top of the bread.

Wednesday, May 4, 2011

Almond Pear Tart

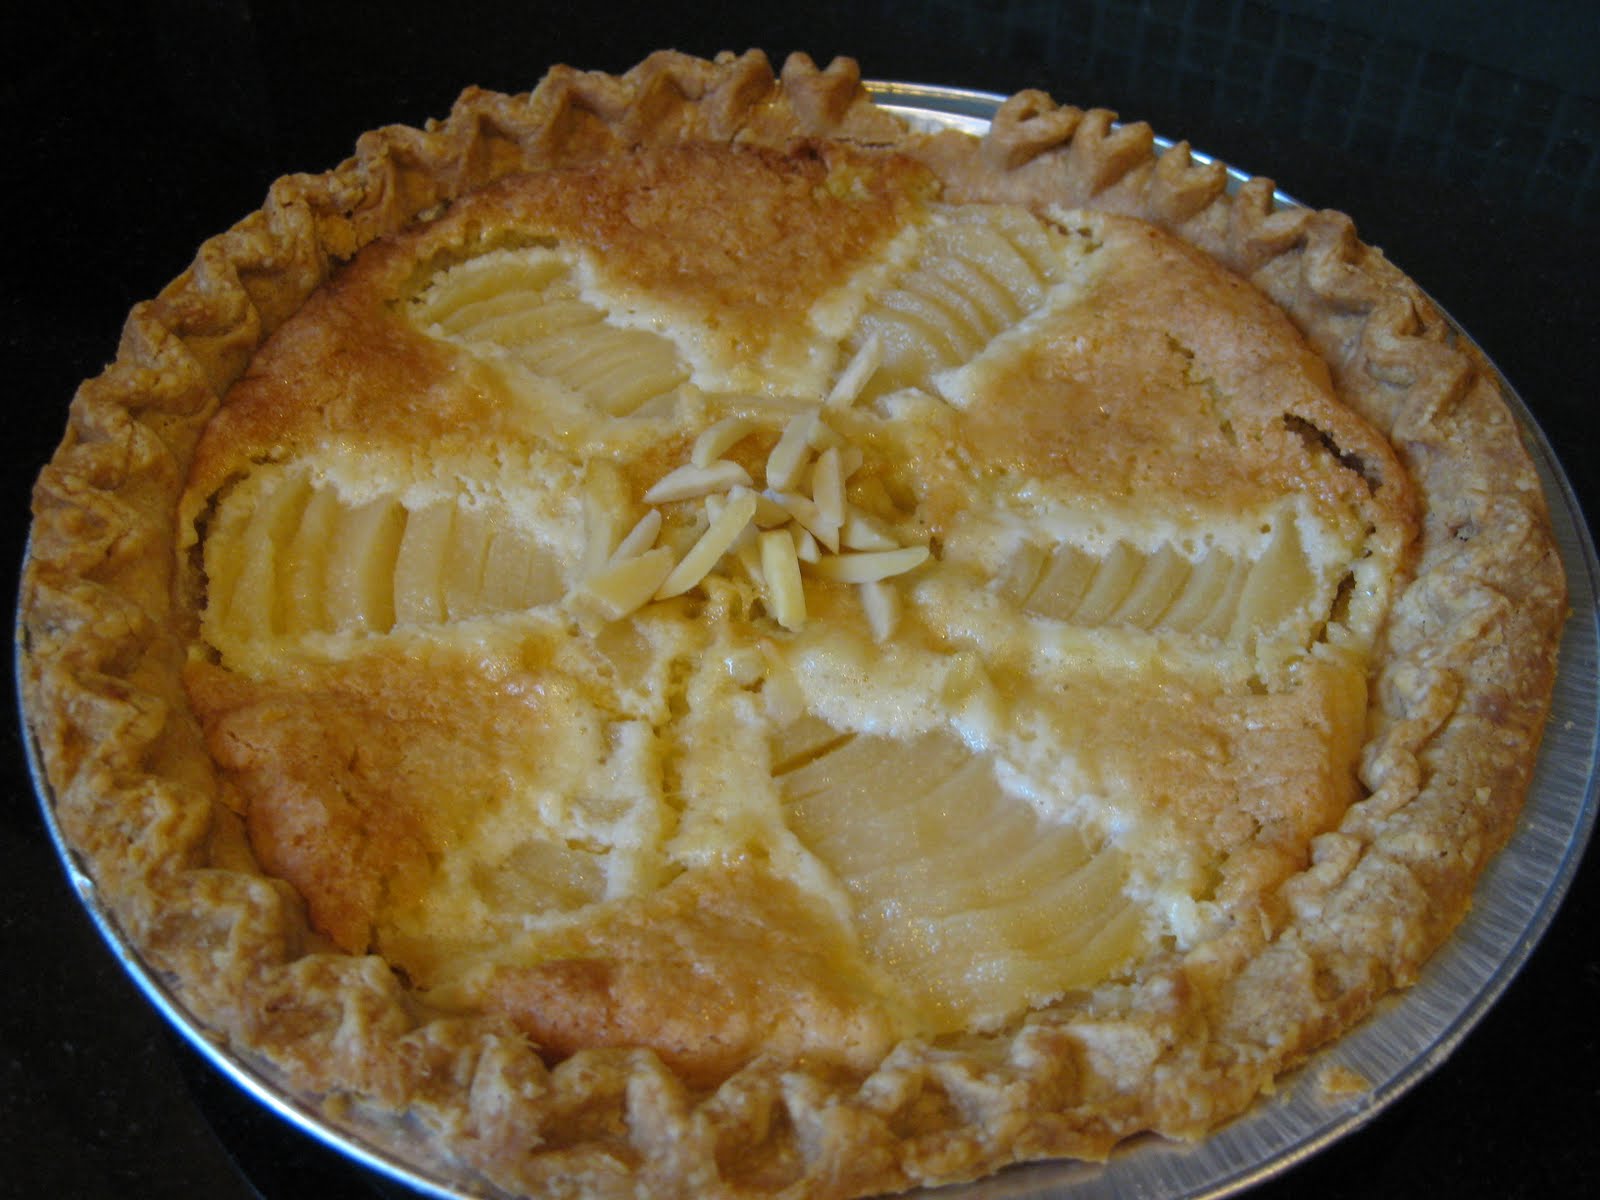
Growing up, did you ever come across words that you did not know the meaning of but that sounded absolutely magical? I certainly did! When I think back, many of these words were centered around food, generally consumed by one of Enid Blyton's heroines at 'clandestine' midnight pool parties...words like 'scones' or 'crumpets' or 'heather'. (I realize now that heather has nothing to do with food, but I still think it sounds magical.) Frangipane, the main ingredient of this recipe, is another such word. Don't you think it just sounds so delectable; I almost like the word more than I like frangipane itself. Frangipane is a pastry filling that is made or flavored with almonds. The filling in this almond pear tart is both made with and flavored with almonds. I first found this recipe on one of my favorite food sites, Epicurious, and owing to its simplicity and understated elegance, I have made it countless numbers of times without modifications. Yesterday, I decided late in the day (and I mean really late) to bring this recipe to a work gathering the following day, having forgotten that one of my colleagues is allergic to dairy. As I had purchased all the other ingredients for this tart already, I decided to just modify the recipe to include non-dairy margarine instead of butter in the filling. Also, it being a weekday, I decided to cheat a little and buy a pre-made pie-crust instead of making the one listed in the recipe (which happens to be quite good). It turns out that frozen pie crusts contain either lard (yuck!) or vegetable shortening (yay!), so having them be dairy-free was not a problem. Additionally, they were sold in sets of two, so I made one tart using butter in the filling and another one with margarine. The consensus from most tasters, who admittedly were not blinded to the identities of the tarts, was that the butter one was slightly creamier, but that both versions were equally 'scrumptious'!

Recipe for Almond Pear Tart

For the pears:

Simmer 3 firm but ripe peeled pears in 4 C of water with 1 C sugar and 2 T lemon juice. When softened, cut in half, discard stem and core, and slice pears crosswise into thin sections. Flatten them slightly with the side of your knife to fan the slices out ever so slightly.

(Cook's Note: You can also simplify your life, as I always try to do, and use canned pear halves in pear juice – you will need 1 can per tart.)

For the crust:

  • 1/2 cup powdered sugar
  • 1/4 cup blanched slivered almonds
  • 1/4 teaspoon salt
  • 9 tablespoons (1 stick plus 1 tablespoon) unsalted butter (or vegetable shortening such as margarine), room temperature
  • 1 large egg yolk
  • 1 1/4 cups all purpose flour

Blend powdered sugar, almonds, and salt in processor until nuts are finely ground. Add butter and blend until smooth, scraping down sides of bowl occasionally. Mix in egg yolk. Add flour. Using on/off turns, blend until dough comes together in clumps. Gather dough into ball; flatten into disk. Wrap in plastic and chill at least 3 hours or upto 2 days.

(Cook's note: I don't actually own a food processor, so I generally blend the nuts in a Mr.Coffee coffee grinder which works great as a nut grinder. I then mix in the butter and egg yolk using a pair of electric beaters and mix in the flour gently by hand.)

Blind-baking the crust: Position rack in center of oven and preheat to 375°F. Roll out chilled dough on floured sheet of parchment paper to 12-inch round, lifting and turning dough occasionally to free from paper. Using paper as aid, turn dough into 9-inch-diameter tart pan with removable bottom; peel off paper. Seal any cracks in dough. Trim overhang to 1/2 inch. Fold overhang in, making double-thick sides. Pierce crust all over with fork. Freeze crust 10 minutes. Blind-bake your pie crust in a heated oven for about 20 minutes until crust is golden brown all over. Let your crust cool at room temperature, while you prepare and chill the filling.

(Cook's note: Since the crust is frozen, it should not be necessary to fill your empty shell with beans or weights during the baking process. If your crust bubbles up during the pre-bake, as mine always does, just smooth it down with the back of a spoon as soon as you remove it from the oven.)

For the almond filling:

  • 2/3 cup blanched slivered almonds
  • 1 tablespoon all purpose flour
  • 7 tablespoons sugar
  • 6 tablespoons (3/4 stick) unsalted butter (or margarine), room temperature
  • 1 large egg
  • 1 tsp. Almond flavoring (optional, but highly recommended)

Finely grind almonds and flour in processor (or nut/coffee grinder). Mix in 7 tablespoons sugar, then butter/margarine, blending until smooth. Mix in egg and flavoring. Transfer filling to medium bowl. Cover and chill for 20 minutes.

(Cook's notes: If you're like me and always cut down the sugar called for in recipes, DON'T on this one -- this is just the right amount. Also, the original recipe calls for a chill time of 3 hours, but I have done this only once. Ever since then, I have cut the chilling time way down, and it appears to make no difference at all. The margarine recipe was slightly softer than the butter recipe after this short chill time of 20 minutes, which makes complete sense when you think about the chemical composition of the two fats. But then again, perhaps not everyone wants this level of detail from a recipe, so I will stop by saying that no more than 20 minutes of chilling is required for a delicious end product.)

Baking the tart: Spoon chilled filling into the cooled crust; arrange the sliced halved pears in a spoke pattern around the tart; fanning them out away from the center slightly; sprinkle a few pieces of almond in the middle of the tart; and bake at 350°F for about 45 minutes or until a knife inserted in the center comes out clean. Remove and cool slightly before attempting to slice.

Serving the tart: This is the most important part of this recipe, in my opinion. Slice the tart in the middle of each "spoke" of pears, so that you have tart slices with pears on either edge of the slice. Serve warm or cold, with or without accompaniments such as whipped cream or vanilla bean ice-cream.


Monday, March 7, 2011

Tiramousse

No doubt everyone these days is familiar with the traditional Italian dessert Tiramisu. I love Tiramisu, not only for its ironic combination of creaminess and airiness, but also for its ease of preparation and versatility. There are so many variations that one could make of this dessert, simply by altering the amounts of some of its key ingredients. You could use more or less coffee. For the alcohol, you could use brandy, or rum, or kahlua – or just omit it altogether in favor of the coffee flavor. You can vary the ratio of mascarpone to cream; you can make this dessert with eggs, the traditional way, or without eggs, which I vastly prefer. And of course, you could make it the right way, with lady finger (savoiardi) cookies, drenched in espresso, or take the alternative route of using sponge-cake (blah!) as the base. This final point, I have found, tends to be the one of greatest contention amongst self-proclaimed Tiramisu aficionados. But one way to get around this dilemma is to omit the cakey base altogether and serve tiramisu, or as I like to call it, Tiramousse, in a cup. This dessert is easy to make, presents beautifully, and is so good that you don't even miss the coffee-soaked cake base of a traditional Tiramisu. The only down-side to this dessert is that it is decidedly more-ish, so it's best made in small quantities, at infrequent intervals, and when there are plenty of friends around to share it with. With that disclaimer, here's my recipe for Tiramousse. And one more note, do let me know when you're going to be making some – I just may have to drop by to say hello ;-)

P.S. Happy birthday Dad…this one's for you!

Tiramousse

4 T mascarpone cheese at room temperature. This is available in most grocery stores these days.

½ C heavy whipping cream, chilled

A tiny, tiny pinch of salt

4 T granulated sugar, or more if you like your desserts extra sweet

1 T rum (or brandy or kahlua)

2 tsp instant coffee powder (or more if you want a very strong coffee flavor)

Optional for serving: a little bit of chocolate ganache made by melting 2 T chocolate chips in 4T heavy whipping cream


10 minutes before you start, chill a bowl and beaters for whipping cream.

Mix mascarpone with sugar, coffee, and rum, and refrigerate while you whip cream.

Add the tiny pinch of salt to a chilled bowl.

(Traditional wisdom suggests that this helps the cream whip faster and lighter. I've verified this in my own test kitchen, but I'm unable to find an explanation for why this may be. Any suggestions?)

Add chilled cream to the bowl, and beat at the highest speed until you have a stiff-ish whipped cream.

(Do not overwhip, as you may end up with butter, which, while delicious, will not help you with this recipe.)

Using a rubber spatula, gently fold in the whipped cream into the mascarpone mixture.

Serve in bowls or glasses, garnished with chocolate ganache, if desired.

Go crazy with the presentation.

You can also make this ahead of time, spoon the tiramousse into your serving bowls and keep refrigerated upto 8 hours.

Friday, March 4, 2011

Paneer Jalfrezi

While I have not officially stated this, it must be pretty apparent that this is a vegetarian food blog. Having been born and raised a vegetarian, this is very much a part of my identity, albeit one that I rarely think about anymore. This is partly because I instinctively make food choices that fit my vegetarian lifestyle while satisfying my nutritional (and hedonic) needs. But this is also partly because I'm blessed to live in a part of the world where vegetarianism, while not the norm, is certainly a prevalent part of the culture. Viva Pacific Northwest! If anything is confusing to people around here, it's the difference between being a vegetarian and a vegan. In fact, just the other day, I was ordering food at the Thai cart on Marquam Hill in Portland, Oregon, when a guy in line behind me, overhearing my questions to the cart lady about vegetarian options, asked me this very question about how a vegetarian is different from a vegan. I explained to him that a vegetarian does not consume animals, while a vegan would also not consume substances derived from animals such as milk or eggs. He then proceeded to inform me that he himself was vegan!!!! So, why exactly did he not know the difference between vegetarianism and veganism? Was he testing me? I'm still so confused!

Anyhow, this whole exchange got me thinking a bit more about the nature of my vegetarianism. While I don't eat meat or anything cooked with meat-containing sauces and pastes, there are certain products that I know to contain animal ingredients that I eat anyway – I suspect that this is true for a vast majority of vegetarians, either due to ignorance and/or ambivalence on the topic. For instance, I do consume vitamin pills, medications, and supplements, many of which contain gelatin, which is derived from cow bones. I also consume, and enjoy, a vast variety of cheeses. I know what you're thinking – cheese is made of milk, which is not off-limits for vegetarians. Yes, but cheese making also usually involves the use of rennet, an enzyme that turns said milk into various forms of gooey, sharp, tangy, delicious cheese products. And this rennet is often derived from bovine stomachs, usually from young calves! In fact, apparently the first cheese ever made was apparently due to the accidental curdling of milk stored in bags made of goats' stomachs and the subsequent discovery of the deliciousness (and longer shelf-life) of this curdled milk.

These days, however, there are many different "vegetarian" rennets available on the market, partially due to the need to offer a product suitable for vegetarians, but mostly because of the lower cost of non-animal rennets. In fact, the majority of industrially produced cheese in the United States uses microbial rennet in cheese-making. European cheeses, sadly, are still largely produced using animal rennets. I wonder if this is due to an unwillingness to depart from tradition, or if the use of specific rennets actually affects the taste of the cheese. (Cheese experts, please weigh in.) In addition to microbial rennets, there are many different substances that have been used around the world to coagulate milk. The most notable among these is the use of an acid such as citric acid from lemons or acetic acid in vinegar to split milk. Cream cheese is made using this acid coagulation method, as is the popular Indian cheese paneer. Considering that a large part of the world's vegetarian population is concentrated in India, it is indeed fortunate that we have a method to produce a delectable cottage cheese without using rennet.

In the past, I've posted my favorite method of making paneer at home. Alternatively, should you be lucky enough to have an Indian grocery store nearby, paneer is readily available in the refrigerated or frozen sections of these stores. While you're there, I would also recommend that you take a look at the vast array of spices and pastes that are available, as many of these are not easily found at other stores or are much less expensive in South Asian stores.

Paneer is extremely versatile, and while it looks somewhat like tofu, thanks to its higher fat content, it lends itself well to flavoring and has a much fuller mouth-feel than tofu. (While I do love tofu, seemingly no spice or marinade ever penetrates its dense structure to flavor it from the inside out, which makes it a poor choice for Indian cooking, with a few exceptions.) A common paneer dish in Indian restaurants is something called Paneer Jalfrezi. This is usually a spicy, dry curry cooked with large chunks of vegetables, tomatoes, paneer, and spices like cumin, coriander, and chilis. Often, in restaurants, cream is added the dish to temper the spiciness of the curry. I like to make a home-style version of this curry to spice up a weeknight meal, as it's very flavorful, a departure from the ordinary, and can be cooked in a single pan in under 30 minutes! I generally just throw together any vegetables that I have on hand, but I particularly like mushrooms and zucchini if I have them. Other options that have worked well are red, yellow, orange and green bell peppers, creamy white heads of cauliflower, and nutty halves of Brussels sprouts. I also omit the cream, as this flavorful curry really doesn't need it. I have used tofu in place of paneer, and while this is not nearly as flavorful, it is arguably a lot healthier.


My recipe for Paneer Jalfrezi follows below, but this is really a dish that has tons of room for creativity and is very forgiving of deviations from the recipe. It goes very well with basmati rice or with rotis, a type of unleavened Indian flat bread.


Paneer Jalfrezi

Vegetables -- Variable, but try the following for a start:

2 Zucchini or summer squash, cut into 2 inch by 1 inch pieces

1 Bell pepper of any color, cut into large chunks

½ Cauliflower, cut into medium to large florets

10 large button mushrooms, quartered

1 red onion, cut into large chunks; do not omit

3 large tomatoes, cut into large chunks; do not omit

8-10 oz. firm paneer, cut into 2 inch cubes

For the curry:

4 cloves of garlic ground with 2 inches of ginger root and 3 green chilis

2 dried red chiils (optional)

1 t turmeric powder (optional)

1 T ground cumin, or more to taste

1 T ground coriander, or more to taste

1 T cumin seeds

Salt, to taste

Garnish:

2 T lemon juice, 3 T chopped coriander leaves

To make:

Add 1T canola (or vegetable) oil to a sauté pan. Once heated, add paneer pieces and sauté till light brown on all sides. Keep aside.

In the same pan, heat 2T oil and add cumin seeds and turmeric to oil.

When cumin starts to splutter, toss in onions and allow to brown.

Add the ground cumin and coriander, as well as the dried red chilis.

Add the ginger/garlic/chili paste and allow this to cook for a few minutes.

Now add the cauliflower, zucchini, peppers, and mushrooms, pausing a few minutes after each addition to allow veggies to cook slightly. Do not overcook. Unlike most Indian curries, the veggies in this dish taste best if they're still slightly crunchy at the end.

Finally, add the tomatoes and salt and allow the tomatoes to wilt slightly. Don't overcook to the point where tomatoes become soggy.

Toss in the browned paneer, being careful not to break the paneer cubes too much as you stir your curry.

Cook slightly longer so the paneer can absorb the flavors of the pot.

Taste the curry and add more spices or salt as desired.

Garnish with a squeeze of lemon juice and chopped coriander leaves. Serve hot (in a copper pot).


Saturday, February 12, 2011

Sweet Valentine

What is the most romantic day of the year? An anniversary? A loved one's birthday? February 14th? If you think the latter, then of course, you are not alone in celebrating this day of love and affection that has taken a strong hold in many countries around the world. Sure, it involves spending horrendous sums of money on mediocre roses; weeks of scouring for the perfect gift; dinner reservations made months in advance -- followed by a dinner had in a supposed aura of romance, but really just in close proximity to dozens of other couples crammed into a dimly-lit restaurant. But, still, it does give you something to look forward to mid-winter, when Christmas festivities are all said and done, and spring is tantalizingly close but not quite here yet.

My first exposure to this Hallmark holiday was when I was 12 years old, after my family had moved from Bombay, India to Kobe, Japan. In the 80's, Valentine's day was still pretty much unheard of in Bombay (and consequently, in all of India), so I was blissfully unaware of the social customs, expectations, and nuances surrounding this day in February. While in the United States, it seems appropriate to given any manner of gift, especially flowers and perfume, on Valentine's day, in Japan, milk or dark chocolate (not white chocolate, we'll get to that in a minute) is pretty much the only gift given. On February 14th, women are expected to give chocolate gifts to their male acquaintances, including all colleagues! Since this is an obligatory gift, it is sometimes referred to as "girichoco" or "chocolate obligation". (I never quite understood how this custom evolved, but doubtless, Meiji had something to do with it. And speaking of commercializing Hallmark holidays, Japan does it better than just about any one else. Check out this link to see what I mean.) One such V-day, my dad received a chocolate heart from two of his colleagues, who told him that they were giving it to him jointly, as a Valentine's day gift. To this, my dad's response was: "So, it's a half-hearted gift?" Unfortunately, the joke was lost in translation, but that doesn't prevent him from repeating it to us every time the topic of Valentine's day comes up.

Anyhow, getting back to V-day in Japan, on February 14, only men receive chocolates from women. This is then followed, a month later, by White day, when these men have to reciprocate the favor by offering gifts of white chocolate to the women who bought them dark chocolate on V-day. And keeping in line with the commercial nature of these celebrations, this return gift is expected to be three times as expensive as the original gift received! My thoughts on this whole exchange are best kept to myself, lest I convey the impression that I do not enjoy receiving exquisite gifts on Valentine's day or any other day, for that matter.

Anyhow, I think that's quite enough of rambling about Valentine's day. Now onto two recipes that I tried out on my friends recently during the spectacular Packers Superbowl win over the…the other team. The first was some delicate and beautiful chocolate crackle cookies, courtesy of Martha Stewart. The second is a red velvet cupcake with a white-chocolate rose frosting.


These pretty, fluffy sweet treats were just the thing to temper this otherwise nachos and dip-heavy testosterone-laden Superbowl party.

The chocolate crackle cookies were something that I've wanted to try for a long time, since they look oh so pretty. I followed this recipe to a 'T', and the cookies were just perfect. The reward for the slightly greater amount of work that these cookies demand was more than worth it. I think I will try adapting these to make ginger molasses cookies soon to use up a jar of molasses sitting in my fridge since Christmas!

If you wanted to make Red Velvet cake from scratch, I'm sure you can find tons of recipes online. I recently saw this, on the essentials of making a Red Velvet cake from scratch, but busy girl that I am, I decided to just use a cake mix. Using the instructions on the back on the package to make mini and regular cupcake yielded a delicious, moist, hard-to-resist end product. I decided to frost these with a little bit of white chocolate ganache (recipe follows), to which I added a touch of rose water, in keeping with the romance of the upcoming V-day.


So, this Valentine's day, if you find that Cupid has aimed his sugar-tipped arrow at you, I hope that you will try one of these recipes and then drop me a note! Bon appétit!

White Chocolate Rose Ganache Frosting

  • 8 ounces white chocolate chips
  • 1 cup heavy cream
  1. Heat cream in a heavy-bottomed saucepan until you start to see tiny bubbles around the edges of the liquid; this is called scalding the cream.
  2. Pour hot cream onto chocolate.
  3. Mix to melt chocolate and refrigerate until chilled through, about 3 hours or more.
  4. Remove from refrigerator and add 3T rose water (optional).
  5. Using an electric mixer, beat on high speed until thick and creamy.
  6. Use immediately, or keep refrigerated upto 2 days.