Pages


Showing posts with label Nuts. Show all posts

Thursday, August 30, 2012

Mendiants

When life gives you lemons, you make lemonade.  So what do you do when life gives you leftover ice-cream toppings from a sundae party?  Why, you make mendiants, of course!

Perhaps I should explain.

This past weekend, we hosted our annual neighborhood ice-cream party in our garden.  The neighbors came.  We lingered over music and ice-cream sundaes and root-beer floats (that all-American thing that I still can’t stomach, but that’s a story for a different day).  But when all was said and done, we were still left with several cartons of ice-cream and tons and tons of toppings.  The ice-cream part was easy to dispatch – a small celebration at work to congratulate one of my colleagues took care of most of it.  But I was still left with a whole load of toppings including mini chocolate chips, dried coconut, salted pistachios, roasted cashews, and other yummy treats.


So, as I was taking stock of all the leftovers, it occurred to me that this would be a perfect time to make mendiants – something I’ve been wanting to do since Christmas, last year.  As I was also in the midst of planning a weekend getaway, I figured these would be a nice treat to bring along to share.


Mendiants are simply little disks of chocolate that are studded with a variety of nuts and dried fruits and allowed to set.  They are usually made by chocolatiers as a way to quickly fashion something out of leftover tempered chocolate.  Apparently, the name mendiant comes from the word mendicant, which would explain why my spellcheck infuriatingly keeps correcting my typing as I write this post.  Traditionally, mendiants showcased four different kinds of toppings representing the four different Roman Catholic monastic orders.  Inspired by the robes of the four orders, mendiants featured raisins for the Dominicans, hazelnuts for the Augustinians, dried figs for the Franciscans, and almonds for the Carmelites.  A quick search through Google did not satisfy me that the colors of the fruits and nuts really correspond to the robe colors of each of these orders, but then again, mendiants were invented far before the days of Google, so I guess I should not question it too much.


Anyhow, to get back to the kitchen, I decided to melt down the remainder of my chocolate chips and top them with various things to make my first batch of mendiants.  To make mendiants, it’s important to have a properly tempered chocolate.  One of my favorite websites, Cooking forEngineers, does a great job at explaining what tempering is and why it’s important.  But the Cliff’s Notes version is that properly tempered chocolate is essential for that unparalleled snap you hear when you bite into a quality piece of chocolate.  Now, if you go and read through the CforE site, you will see that there are many different ways to temper chocolate.  My preferred method for small scale applications like this recipe is the microwave method.  Essentially, this involves placing chocolate chips in a microwave-safe bowl, and heating at 30 second intervals and stirring in-between until about 80% of the chocolate is melted.  Follow this up with vigorous mixing of the chocolate until the unmelted chocolate melts into the already melted chocolate.  You can read all about the cool science behind this at the CforE site – this post is already too long, as it is.  I love dark chocolate, so this is pretty much the only kind I buy, but you can really make this with any kind of chocolate that you prefer.

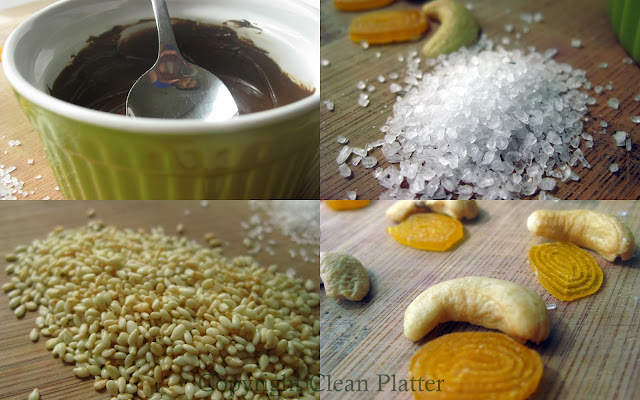
Once you have your tempered chocolate, you are limited only by your imagination in making mendiants.  On the first batch, I went conventional with pistachios, dried coconut, golden raisins, and cashews.  But soon after, I was inspired to take it up a notch and made my second batch with dried mango, roasted cashews, toasted sesame, and a liberal pinch of sea-salt.  Both batches were delicious, and I can already see endless possibilities for future recipes.   

On that note, I would love to hear about the imaginative things you decide to put on your mendiants, but I only have one request – please, no BACON!


Mendiants

Tempered chocolate
Toppings – a variety of dried fruits and nuts
            Suggestions:
            Pistachios
            Cashews
            Dried coconut
            Raisins
            Sea salt
            Toasted sesame
            Dried figs or mangos
            A pinch of paprika

Layer a baking sheet with wax paper
Spoon tempered chocolate into 1-inch diameter disks
Before chocolate hardens, place toppings decoratively on top
Allow to set at room temperature or in the fridge
Store refrigerated up to 3 weeks in an airtight container

Friday, August 24, 2012

Nut Brittle


While I generally consider myself an adventurous cook, there are certain areas of the culinary arts that definitely intimidate me.  Therefore, scared off by burnt fingers, scalding hot sugar syrup, and pots and pans that are a nightmare to clean, I have generally steered clear of any type of candy making since my early experimenting days.  But a while ago, as I was walking down the cook’s tools aisle of my local store, my eye kept being drawn to a cute candy thermometer.  Maybe, just maybe, being armed with a gadget, would somehow help me overcome my fears of boiling syrup, I thought to myself.  Who knows, maybe candy making was my true calling, and I had been shirking from it all these years simply because I didn’t have the right tools.  At least, this is what I told  myself as I marched out of that store with a brand new candy thermometer.  
That was over a year ago.  This past week, as I was rummaging through my baking tools searching for some other impulsive purchase made and forgotten long ago, what did I stumble upon?  Yup, you guessed it – the candy thermometer!  There it was, still in its packaging, fading away inside a dark drawer.  Seized by feelings of shame at my own procrastination, I immediately ditched the original recipe that I was going to make, which is just as well, since I didn’t have any butter, which was called for in the recipe.  Instead, I decided, today would be the day to tackle my fears of boiling sugar syrup.

Having made that first bold decision, now I just had to settle on what to make.  I definitely wanted to start with something relatively easy.  And I had already bought a bunch of nuts for the other recipe that I thought I was going to be making that day.  So, with these two constraints, I settled on a nut brittle as the object of my first experiment with the candy thermometer.

After a quick search on the internet, I came across this recipe on Food and Wine.  Now, when one comes across the “Best-ever” anything, why would one search any further?  Besides, I was intrigued by the addition of salt to the brittle in this recipe, as I have always enjoyed the juxtaposition of salt and sweet.  I did feel that it lacked a little something in flavor, so I added a little bit of cardamom, which I think elevated these to something even more special.  I had both pistachio and peanuts on hand, so I used these nuts in two separate halves of the brittle.  


Since this recipe makes quite a large batch, I brought most of it to work to share with colleagues.  If the speed at which these disappeared is any indication of taste, then I think it’s safe to say that these were pretty darn tasty.  (Of course, it could also mean that scientists are particularly voracious brittle eaters, but you can see why I prefer the former interpretation.)  So, I must say, that apart from a few minor incidents involving hot syrup on delicate fingertips and bare toes, my preliminary foray into candy making was a resounding success.  It just goes to show that gadgets, even little ones like candy thermometers, do improve our lives, even if it is to just give us the confidence to try something new.

Recipe (adapted from Food and Wine)
2 cups sugar
1/2 cup water
1 stick unsalted butter
1/3 cup light corn syrup
1/2 teaspoon baking soda
12 ounces roasted salted peanuts, cashews, pistachios and/or pecans
6 green cardamom pods, peeled and finely ground
Coarse sea salt - enough to sprinkle lightly over your whole brittle

In a large saucepan, combine sugar, water, corn syrup, butter, and cardamom.  Bring to a boil**. 
Cook over moderately high heat, stirring occasionally, until the caramel is light brown and registers 300° on a candy thermometer.  This takes between 10 and 15 minutes. 
Remove from heat.  Place pan over a plate or baking tray and carefully stir in the baking soda. The mixture will bubble.
Stir in the nuts*, then immediately scrape the brittle onto a large rimmed, nonstick baking sheet.
Using the back of a large spoon, spread the brittle into a thin, even layer. Sprinkle with salt.
Let cool completely, about 30 minutes. Break the brittle into large shards.

Cook’s Notes
**Do not, and I repeat, do NOT touch the hot syrup with your fingers, lips, tongue, or really, any other body part.  It will stick to your skin and burn you, and no amount of hopping around screaming unholy words will help the sting.
*If you’d like to make two different types of nut brittles, you can simply spread the nuts thickly on two halves of your baking sheet, and pour the hot syrup over the nuts, rather than mixing the nuts into the syrup before pouring.
The brittle should store well at room temperature for up to a month, but I doubt that it will last that long.