Pages


Thursday, October 11, 2012

Tomato Fritters


No matter what the situation, we humans always find a reason to complain.  And nothing, in my mind, elicits more complaints from people everywhere (except maybe those lucky enough to be living in some paradise like Hawaii or San Diego) than the weather!  All winter long, we complain that it’s too cold, or that there’s too much rain or snow.  And then come summer, suddenly, it’s too hot, it’s too dry, there are too many mosquitoes – the list goes on and on.  Similarly, if you live in the Northwest (of the US) and fancy yourself to have a bit of a green thumb, every summer you complain from June to September about how your tomatoes are just not ripening fast enough.  And then, all of a sudden, at the end of September, the tomatoes start coming in all at once, and now you’re stuck with finding a way to consume all those plump, juicy, red (or yellow or orange) fruits, in larger-than-Costco quantities.


Some of my more domestic friends look forward to this task and whip out their canning equipment to make salsas and pasta sauces and other delicious things.  But by September, with all the jam that I’ve canned during berry season, I don’t want to see another boiling water bath until at least next year.  To my lazy bones, tomatoes in September are for immediate gratification – after all, I have waited all summer for them to ripen!

In the spirit of wholesale tomato consumption, I try to experiment with new recipes that incorporate these summer ripened fruits.  I recently came across a recipe for a Greek dish, called domatokeftehes, or tomato fritters, which seemed to be just the thing to accompany a Friday evening cup of tea with the hubby.  Of course, as I started making these, my Indian brain took over and turned these fritters into something that no Greek person would recognize, but I think they turned out rather nice.  Do you agree?

 Tomato fritters

1 large ripe tomato, diced
½ zucchini, diced
½ tsp turmeric
½ tsp salt
1 tsp chili powder
1 tsp cumin seeds
2 T chopped fresh herbs such as oregano or cilantro
½ C flour
½ tsp baking powder

Mix all ingredients together, adding the flour and baking powder last.
Add enough water to form a thickish batter
Heat oil in wok on high heat until a drop of batter dropped into oil rises immediately to surface
Reduce heat to medium and drop tablespoon-fulls of batter into oil
Allow to brown on all sides; remove from oil with a slotted spoon, and drain on paper towels
Serve hot with spiced tea.


Wednesday, September 19, 2012

Pedas for Ganesha: Indian Milk Fudge


Ganesha, the elephant-headed God, is perhaps the most famous from among the pantheon of Hindu deities.  Traditionally, Ganesha is considered the God of knowledge and is prayed to at the start of any new venture.  Every year, the birthday of Ganesha – termed Ganesh Chathurthi --  is celebrated with great pomp throughout India.  This was one of my very favorite times of the year as a child growing up in India.  The monsoons would have come to an end.  My birthday would be right around the corner.  We’d even have several days off from school.  On the morning of Ganesh Chathurthi, we would wake up early and head to the local clay artist who would have set aside a lovely clay Ganesha just for me.  We would bring home this colorful statue with great pomp – I even had a little parasol just for this occasion, so that I could hold it over Ganesha’s head as we walked him home under the scorching Indian sun.  This same ritual would be playing out all around us, as our friends and neighbors also brought home their own special Ganesha statues to install at home.  Traditionally, this would be followed by 3 to 10 days of prayer.  At the end of this period, the Ganesha statue would be taken to the local lake and allowed to dissolve.  As the clay sculpture of Ganesha dissolves, he is thought to melt away all the misfortunes of his loyal devotees.

In Bombay, in particular, Ganesh Chathurthi was celebrated with great fanfare.  In the months leading up to day, almost every temple would commission local artists to create humongous Ganesha statues – the larger the temple, the larger the statue and the more elaborate the display.  After months of seeing these temporary installations being secretively built behind burlap scaffolding, during the week of Ganesh Chathurthi, the drapes would finally be lifted and we would be allowed to wander, awestruck, through the ever-more elaborate sets.  This would all culminate with the city awarding prizes to the temples with the best displays.

Closer to home, other festivities would be brewing.  As is evident from his big belly, Ganesha is considered to be quite the gourmand, so one of the mainstays of this festival is the range of delicacies prepared by my mom and my friends' moms, alike.  
Even today, though I have moved far, far away from these scenes of my childhood, the memories of those celebrations are still fresh in my heart.  While I don’t necessarily have the time to prepare elaborate delicacies before heading out to work in the morning, I do still try to make something special in the kitchen to mark the occasion. A few months ago, I came across several recipes for microwavable Doodh peda, a type of dense Indian milk fudge.  I have since been able to adapt this recipe for just such an occasion.  So, although my ramblings about my childhood memories have been long, this recipe is anything but complicated or time-consuming.  It literally comes together in less than 10 minutes but tastes like you have been reducing milk over the stove for hours and hours.

So, in honor of today’s celebration of Ganesh Chathurthi, I give you this super simple Doodh peda or milk fudge recipe.  With its short, short ingredient list, and the ease of zapping it up in a microwave, I have a feeling that this recipe is going to make into my own fledgling list of kitchen traditions.

Microwaveable Doodh Peda or Milk Fudge (makes 2 dozen)

1 14 oz. can of sweetened condensed milk
2 C non-fat dried milk
1 stick of unsalted butter
4 pods of green cardamom, peeled and finely ground
A pinch of saffron (optional)
Nuts (optional for garnish)


Place butter in a large microwavable bowl and microwave for about a minute, until butter is melted
Stir in dried milk and condensed milk until well mixed
Place bowl on a plate, and heat in microwave at full power for 4 minutes in 1 minute intervals
After each minute, remove from microwave and stir well
Watch carefully so that the mixture doesn't bubble over while heating (but in any case, that's what the plate beneath the bowl is for)
Once mixture is thickened to a fluffy ricotta-like consistency, add cardamom and saffron.
Mix well, and spread on plate to cool for about 2 minutes
Once it's cool enough to handle, make 1 inch balls and flatten out slightly to form a thick disk
Garnish top of disk with nuts or more saffron
Store for up to a week in the fridge

Thursday, August 30, 2012

Mendiants

When life gives you lemons, you make lemonade.  So what do you do when life gives you leftover ice-cream toppings from a sundae party?  Why, you make mendiants, of course!

Perhaps I should explain.

This past weekend, we hosted our annual neighborhood ice-cream party in our garden.  The neighbors came.  We lingered over music and ice-cream sundaes and root-beer floats (that all-American thing that I still can’t stomach, but that’s a story for a different day).  But when all was said and done, we were still left with several cartons of ice-cream and tons and tons of toppings.  The ice-cream part was easy to dispatch – a small celebration at work to congratulate one of my colleagues took care of most of it.  But I was still left with a whole load of toppings including mini chocolate chips, dried coconut, salted pistachios, roasted cashews, and other yummy treats.


So, as I was taking stock of all the leftovers, it occurred to me that this would be a perfect time to make mendiants – something I’ve been wanting to do since Christmas, last year.  As I was also in the midst of planning a weekend getaway, I figured these would be a nice treat to bring along to share.


Mendiants are simply little disks of chocolate that are studded with a variety of nuts and dried fruits and allowed to set.  They are usually made by chocolatiers as a way to quickly fashion something out of leftover tempered chocolate.  Apparently, the name mendiant comes from the word mendicant, which would explain why my spellcheck infuriatingly keeps correcting my typing as I write this post.  Traditionally, mendiants showcased four different kinds of toppings representing the four different Roman Catholic monastic orders.  Inspired by the robes of the four orders, mendiants featured raisins for the Dominicans, hazelnuts for the Augustinians, dried figs for the Franciscans, and almonds for the Carmelites.  A quick search through Google did not satisfy me that the colors of the fruits and nuts really correspond to the robe colors of each of these orders, but then again, mendiants were invented far before the days of Google, so I guess I should not question it too much.


Anyhow, to get back to the kitchen, I decided to melt down the remainder of my chocolate chips and top them with various things to make my first batch of mendiants.  To make mendiants, it’s important to have a properly tempered chocolate.  One of my favorite websites, Cooking forEngineers, does a great job at explaining what tempering is and why it’s important.  But the Cliff’s Notes version is that properly tempered chocolate is essential for that unparalleled snap you hear when you bite into a quality piece of chocolate.  Now, if you go and read through the CforE site, you will see that there are many different ways to temper chocolate.  My preferred method for small scale applications like this recipe is the microwave method.  Essentially, this involves placing chocolate chips in a microwave-safe bowl, and heating at 30 second intervals and stirring in-between until about 80% of the chocolate is melted.  Follow this up with vigorous mixing of the chocolate until the unmelted chocolate melts into the already melted chocolate.  You can read all about the cool science behind this at the CforE site – this post is already too long, as it is.  I love dark chocolate, so this is pretty much the only kind I buy, but you can really make this with any kind of chocolate that you prefer.

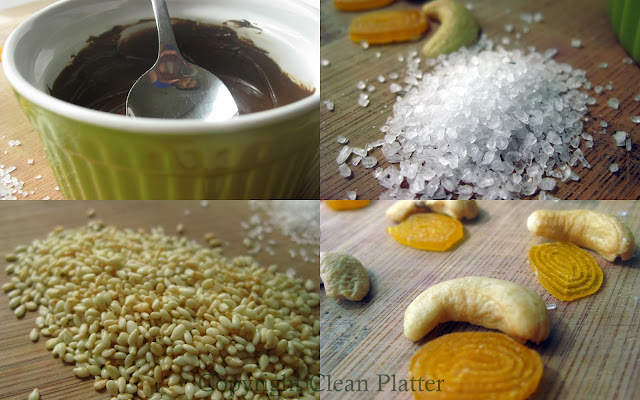
Once you have your tempered chocolate, you are limited only by your imagination in making mendiants.  On the first batch, I went conventional with pistachios, dried coconut, golden raisins, and cashews.  But soon after, I was inspired to take it up a notch and made my second batch with dried mango, roasted cashews, toasted sesame, and a liberal pinch of sea-salt.  Both batches were delicious, and I can already see endless possibilities for future recipes.   

On that note, I would love to hear about the imaginative things you decide to put on your mendiants, but I only have one request – please, no BACON!


Mendiants

Tempered chocolate
Toppings – a variety of dried fruits and nuts
            Suggestions:
            Pistachios
            Cashews
            Dried coconut
            Raisins
            Sea salt
            Toasted sesame
            Dried figs or mangos
            A pinch of paprika

Layer a baking sheet with wax paper
Spoon tempered chocolate into 1-inch diameter disks
Before chocolate hardens, place toppings decoratively on top
Allow to set at room temperature or in the fridge
Store refrigerated up to 3 weeks in an airtight container

Friday, August 24, 2012

Nut Brittle


While I generally consider myself an adventurous cook, there are certain areas of the culinary arts that definitely intimidate me.  Therefore, scared off by burnt fingers, scalding hot sugar syrup, and pots and pans that are a nightmare to clean, I have generally steered clear of any type of candy making since my early experimenting days.  But a while ago, as I was walking down the cook’s tools aisle of my local store, my eye kept being drawn to a cute candy thermometer.  Maybe, just maybe, being armed with a gadget, would somehow help me overcome my fears of boiling syrup, I thought to myself.  Who knows, maybe candy making was my true calling, and I had been shirking from it all these years simply because I didn’t have the right tools.  At least, this is what I told  myself as I marched out of that store with a brand new candy thermometer.  
That was over a year ago.  This past week, as I was rummaging through my baking tools searching for some other impulsive purchase made and forgotten long ago, what did I stumble upon?  Yup, you guessed it – the candy thermometer!  There it was, still in its packaging, fading away inside a dark drawer.  Seized by feelings of shame at my own procrastination, I immediately ditched the original recipe that I was going to make, which is just as well, since I didn’t have any butter, which was called for in the recipe.  Instead, I decided, today would be the day to tackle my fears of boiling sugar syrup.

Having made that first bold decision, now I just had to settle on what to make.  I definitely wanted to start with something relatively easy.  And I had already bought a bunch of nuts for the other recipe that I thought I was going to be making that day.  So, with these two constraints, I settled on a nut brittle as the object of my first experiment with the candy thermometer.

After a quick search on the internet, I came across this recipe on Food and Wine.  Now, when one comes across the “Best-ever” anything, why would one search any further?  Besides, I was intrigued by the addition of salt to the brittle in this recipe, as I have always enjoyed the juxtaposition of salt and sweet.  I did feel that it lacked a little something in flavor, so I added a little bit of cardamom, which I think elevated these to something even more special.  I had both pistachio and peanuts on hand, so I used these nuts in two separate halves of the brittle.  


Since this recipe makes quite a large batch, I brought most of it to work to share with colleagues.  If the speed at which these disappeared is any indication of taste, then I think it’s safe to say that these were pretty darn tasty.  (Of course, it could also mean that scientists are particularly voracious brittle eaters, but you can see why I prefer the former interpretation.)  So, I must say, that apart from a few minor incidents involving hot syrup on delicate fingertips and bare toes, my preliminary foray into candy making was a resounding success.  It just goes to show that gadgets, even little ones like candy thermometers, do improve our lives, even if it is to just give us the confidence to try something new.

Recipe (adapted from Food and Wine)
2 cups sugar
1/2 cup water
1 stick unsalted butter
1/3 cup light corn syrup
1/2 teaspoon baking soda
12 ounces roasted salted peanuts, cashews, pistachios and/or pecans
6 green cardamom pods, peeled and finely ground
Coarse sea salt - enough to sprinkle lightly over your whole brittle

In a large saucepan, combine sugar, water, corn syrup, butter, and cardamom.  Bring to a boil**. 
Cook over moderately high heat, stirring occasionally, until the caramel is light brown and registers 300° on a candy thermometer.  This takes between 10 and 15 minutes. 
Remove from heat.  Place pan over a plate or baking tray and carefully stir in the baking soda. The mixture will bubble.
Stir in the nuts*, then immediately scrape the brittle onto a large rimmed, nonstick baking sheet.
Using the back of a large spoon, spread the brittle into a thin, even layer. Sprinkle with salt.
Let cool completely, about 30 minutes. Break the brittle into large shards.

Cook’s Notes
**Do not, and I repeat, do NOT touch the hot syrup with your fingers, lips, tongue, or really, any other body part.  It will stick to your skin and burn you, and no amount of hopping around screaming unholy words will help the sting.
*If you’d like to make two different types of nut brittles, you can simply spread the nuts thickly on two halves of your baking sheet, and pour the hot syrup over the nuts, rather than mixing the nuts into the syrup before pouring.
The brittle should store well at room temperature for up to a month, but I doubt that it will last that long.

Sunday, August 19, 2012

Peach Ginger Tart


When it comes to fruit, I’m of the opinion that fresh and unadorned is best.  Especially in the summertime, I really don’t believe in fooling around with fresh fruit, when they are at their chin-drippin’ best.  One of the exceptions to this rule of mine, of course, is the copious amounts of jam that I bottle every summer in anticipation of dark winter mornings when only a bit of Hood berry jam, preserved at its peak, will chase away the doldrums.  So, I have never really understood the obsession with various fruit pies and other sweet creations that claim to somehow augment something that is pretty perfect to begin with.


But as with any rule, exceptions must be made.  For instance, when you’ve invited people over for a mid-summer meal and want to impress with something more creative than cut fruit.  In the case of my “Don’t mess with summer fruit” rule, another exception I make is for fruit tarts, such as this Peach-Ginger Tart.  This is especially true for stone fruits like peaches, plums, and cherries, that pair wonderfully with a bit of sugar, a bit of spice, and a flaky pie crust.  But in keeping with not messing with the fruit too much, I like to keep my recipes very simple, opting not to peel the fruit or poach or cook it in any way before baking.  This generally leads to a very rustic looking product that still manages to capture the flavor of summer fruit at its best, while elevating it to something that you might serve at the end of a long summer repast without appearing too lazy.  Yet, these are so easy to put together, especially if using store-bought pie sheets, that they will not cut too much into your lazing around doing nothing time, either.  


This tart can be made as shown using a 9” tart shell, or can be adapted to make individual galettes.  Either way, it tastes great by itself, or with vanilla bean ice-cream, on a balmy summer evening.  


Peach-Ginger tart

Ingredients:

1 pie crust (either store-bought, as I prefer, or use your favorite recipe)
4-6 firm but ripe peaches, sliced into ½ inch thick slices
¼ C packed brown sugar
¼ C white sugar
2 t ginger powder or 1 T finely grated ginger root
1 T corn starch
Juice of 1 lemon

Mix all ingredients (except pie crust, of course) and marinate for 1 hour at room temperature or overnight in the fridge

Preheat oven to 350 deg F

Line a greased 9” tart pan with pie crust
Cover with wax paper, fill tart with dry beans or pie weights
Bake for 15 minutes and remove
Fill pie with fruit filling, and bake for 40 minutes or until filling is set and crust is golden brown

Serve warm or at room temperature


Monday, August 13, 2012

Poor Man’s Pesto


Summer has certainly taken its own sweet time getting to the Pacific Northwest.  I know I shouldn’t have been complaining.  While the rest of the country has been sizzling under cloudless skies, we had been waking up to misty mornings that rarely turned into days hotter than 70 degrees.  Inevitably, this has meant that my basil plants, that longed for sultry summer days as much as I did, had entered a holding pattern ever since I planted them.  My oregano bush, on the other hand, has loved the warmish winter we just had, followed by the coolish summer we had been having and has gone from an oregano grove to a full-fledged forest, right underneath my plum tree.  All this suddenly changed about 2 weeks ago, when summer finally arrived in Portland, and things started heating up fast.  With tomatoes a-ripening, and beans a-growing, I had just about forgotten about my oregano plant, which is now hidden beneath the nodding heads of sunny day lilies.  But as I was pruning bushes in the garden the other day, I noticed that the oregano was just about to start flowering and was badly in need of a haircut.  Initially, my plan was to dry the oregano leaves for use later in the year, but being too lazy to actually do that, I thought I’d put the harvest to good use in an oregano pesto.
Basil Smorgasbord

While traditionally made with basil, pesto can of course be adapted for a variety of herbs, including oregano, parsley, and cilantro.  However, after having made oregano pesto several times, I think that all the non-basil pestos, except cilantro, taste best when at least a few basil leaves are tossed into the mix.  Purists would argue that a true pesto must be crushed in a mortar and pestle to get the right consistency, but I generally use a coffee grinder for my homemade pesto, with great results.

I call this version of pesto, using oregano as the main herb, Poor Man’s Pesto, since basil can be quite expensive when store-bought.  I guess to truly qualify as a poor man’s pesto, one should use walnuts instead of pine nuts, but I greatly prefer pine nuts in my pesto – they are milder and less prone to rancidity than walnuts.  So, I guess this is really more of a Middle-class Pesto than a true Poor Man’s Pesto, but it can be adapted up or down, depending on your tastes. 

It goes great on grilled bread, as a sauce for pasta.  It can also be mixed in equal parts with mayonnaise for a wonderfully flavorful aioli dipping sauce, which goes great with fries.


Oregano Pesto

1.5 C oregano leaves
¼ c basil leaves
½ C pignolis or pine nuts
½ C extra-virgin olive oil, first cold-pressed
Juice of half a lemon
6 cloves garlic
1 tsp salt, or more to taste
½ C grated parmesan

Grind together all ingredients to a coarse paste
Spoon into a jar and top with a little more olive oil to prevent oxidation during storage
Keep refrigerated up to 3 weeks


Saturday, August 4, 2012

Fluffy Buttermilk Pancakes

Sometimes, the seemingly simplest of foods can be the hardest ones to have a perfect recipe for.  You know the ones I’m talking about – oatmeal raisin cookies, Sunday morning waffles, chocolate brownies.  Part of the reason for this is that these commonly prepared foods have so many variations, and practically everyone you talk to will tell you that they have THE perfect recipe for it.  But often times, what it comes down to starting with a basic recipe followed by good old trial and error in your own kitchen, until you have that perfect recipe that can be handed down through the generations as The world’s best what-have-you.  One such food that I have tried countless recipes for -- some with good success, and some that were utter disasters -- is pancakes.  Over the years, I have figured out that while I like different variations such as buckwheat or cornmeal pancakes, the regular ones made with flour are the ones that I keep coming back to on lazy Sunday mornings.  I also know that any pancake that I am going to enjoy has to have buttermilk in it and be only very slightly sweetened.  Also, none of those flat,thin pancakes for me – I like them thick and fluffy.  And of course, they need to be easy to make and not require extensive steps like beating egg whites to a foam.  With all these criteria in mind, I am now finally armed with the perfect recipe for pancakes – this recipe can easily be scaled up or down; the batter stores well in the refrigerator through the weekend; and most importantly, this recipe lends itself to countless variations and I give you two of them, below.  Here’s my recipe for Buttermilk pancakes – I call them, quite simply, “The World’s Best Buttermilk Pancakes”.

Yield: 1 dozen thick pancakes

Dry ingredients
  • 3 cups all-purpose flour
  • 2  tablespoons white sugar
  • 3 teaspoons baking powder
  • 1 1/2 tsp baking soda
  • 3/4 teaspoon salt
Wet ingredients
  • 1/3 cup melted butter
  • 3 eggs
  • 3 cups buttermilk, or substitute with 2C thick yogurt and 1C water, beaten together
  • 1/2 cup skim milk

Sift together dry ingredients
Beat together wet ingredients
Add wet ingredients to dry ones and stir lightly with a fork, until just combined.  The batter should have plenty of lumps.  Do not overmix.

Heat up a griddle to medium-hot.  It’s better to have too cold a griddle than too hot.
Lightly butter griddle, and pour ½ C batter onto griddle
Shake griddle lightly to spread batter, just a little
Allow pancake to cook until bubbles appear in batter.  If adding any other toppings, do so at this stage.
Flip and allow to cook till golden brown on both sides
If your pancakes are not cooked completely on the inside, let your griddle cool and try again. 

Serve hot with pure maple syrup on the side (as I prefer) or poured on top.


Banana Chocolate Chip Pancakes -- to make about 5 pancakes

           1 ripe banana, sliced into thin slices
           1/3 cup dark chocolate chips

Follow buttermilk pancake recipe and place banana slices and chocolate chips on pancake, while the top of the pancake is cooking

Try to bury the chocolate chips in the uncooked batter, and using a spoon, spread a little of the unset batter to partially cover the bananas

Flip and cook till golden brown on both sides


Nectarine walnut pancakes -- to make about 5 pancakes

           2 ripe nectarines or plums, sliced into thin slices
           1/3 cup chopped walnuts

Follow buttermilk pancake recipe and place nectarine slices and walnuts on pancake, while the top of the pancake is cooking

Press down walnuts and nectarines slightly so that they are partially buried in the uncooked batter

Flip and cook till golden brown on both sides