Pages


Showing posts with label Almonds. Show all posts

Sunday, February 5, 2012

Date nut truffles

With Valentine’s day just around the corner, no doubt many of you have started thinking about making some sweets for your sweets. If you don’t want to sabotage your New Year’s resolutions of healthy eating but would still like to make a special treat, here’s a recipe for a guilt-free truffle made with dates and almonds that is quite pretty and absolutely delectable. I don’t generally add any honey to the recipe, but you may prefer it sweeter. Also, while the cloves and pepper are optional, I highly recommend adding them, as they elevate these date truffles into truly sophisticated morsels.

1 C pitted dates

2 T very hot water

1/4 C blanched almonds

A tiny pinch of clove powder

1/4 tsp finely ground black pepper

2 T honey, optional

1/4 C dessicated unsweetened coconut flakes

Soften dates by placing them in a bowl and adding 2T boiling hot water over them

While waiting, grind almonds to a fine powder

Now, grind dates to a paste in a food processor, coffee grinder, or by hand in a mortar and pestle

Combine dates, almonds, cloves, pepper, and honey, and mix well

Form 1 inch balls and roll smooth. Roll in coconut to coat. Gift and enjoy, guilt-free.

Friday, May 20, 2011

We all scream for ice-cream!

Aaah, sweet sunshine at last! Spring arrived in Portland a while ago, but although the birds were a-chirping and the buds were a-blooming, it hadn't really felt like winter had released its cold grey hold. Until this week, that is. Finally, we have seen a few days of uninterrupted sunshine, and both I and my garden are grateful for it. With sunshine, of course, comes many things – roses, picnics, trips to the beach, Vitamin D, and best of all, ice-cream. I have a theory that no one can be angry when they're eating ice-cream. It has the power of transporting us to a happy place, at least for the few moments while we relish the creamy, cold, sweetness before it starts to melt all over our hands and clothes. (Hmmm, I hope some of you can relate to this, because otherwise, I may just be a very messy ice-cream eater.)
I've wanted to write a post about ice-cream for a long, long time, especially after a recent trip to Italy which began and ended with cones of freshly-made gelato (and was heavily punctuated with more gelato in between, of course). In retrospect, almost every phase of my life has had a particular ice-cream "experience" associated with it.

Tartufo in Rome

When I was a graduate student at the University of Wisconsin, trips to the Babcock Hall Dairy Store was de rigueur in the summers. The trick to the summer ice-cream jaunts was to get to Babcock Hall before the kindergarteners arrived en masse. Once those little ice-cream eyed kids got in line before you, you knew that it would be well past an agonizing half hour before you got your hands on any "Union Utopia" or "Badger Brownie Blast".

As an undergraduate at the University of New Hampshire, we had a similar summer routine of weekly ice-cream trips to the UNH Dairy Bar. Situated at a quaint train station, which at the time was defunct, the Dairy Bar would serve up whopping portions of cool treats, all locally made at the University.

Growing up in Japan, the preferred summer cold treat was shaved ice. Now, I know what you're thinking, shaved ice is not ice-cream. Yes, I agree. But in the humid, 90-degree plus days of summer in Kobe, Japan, melon- and pineapple-flavored shaved ice was in many ways far better than ice-cream. I have countless memories of being saved by shaved ice during the summers of my teen years: lemon-flavored ice after swimming at the local recreation center; strawberry-flavored ice with friends after a window-shopping trip; coconut-flavored ice with my dad at the summer 'matsuri'. In fact, shaved ice is so popular in Japan that even in crowded cities, the shaved ice vendor would wind through the streets with his cart, loudly advertising his goodies. This brings me to my favorite ice-cream memories of all, the ones of my childhood in Bombay.

One of the most important experiences of summer holidays as a child was the utter boredom that inevitably came after the initial frenzy of unbridled joy. As I grow older, I find that I really miss having the time to be bored. Amidst the alternating joy and boredom of summer hols, one man would appear nightly in our neighborhood, giving us kids something to look forward to. No, not Wee Willie Winkie but the "kulfiwallah", or, literally translated, the 'kulfi'-man. (If I were a better artist, I could probably draw a pretty good replica of this man, since his image seems to be etched in my memory. But as it is, my drawing skills leave much to be desired, and I'm left with just my words to paint you a picture of those summer nights, instead.)

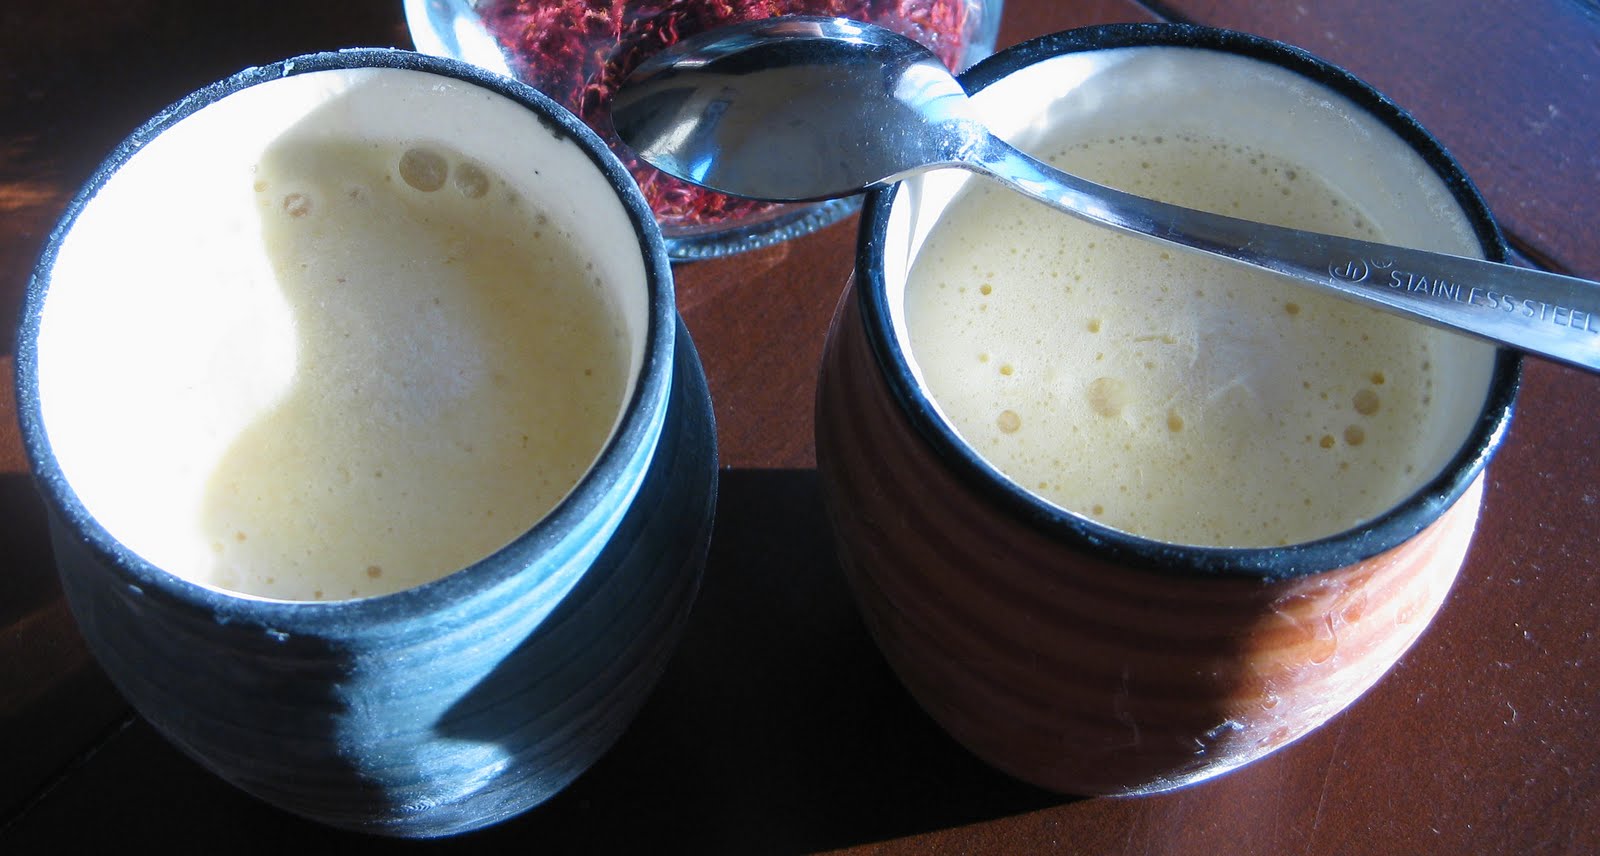
Kulfi (recipe follows below) is a type of Indian ice-cream that is made by slow-freezing a concoction of reduced milk and sugar, flavored with pistachios, cardamom, or saffron. The kulfiwallah of our neighborhood was an old man, wrinkled with age, his skin leathery from having walked around under the Bombay sun all day long. His voice was always hoarse, and on the brink of cracking, which, in my naïveté, I imagined was a result of eating too many kulfis. His cry of "kulfi-wallah" was to be heard quite frequently during the balmy summer nights. He would be dressed in loose-fitting pants and shirt that were once white, with a pointed white cap on his head. He carried on his head a huge straw basket covered with a damp red cloth, concealing dozens of sealed metal tubes. If you had been good and your parents decided to buy you some kulfi that day, he would set down his heavy load and pull out a metal tube, open it deftly with a long knife, and coax a perfectly molded kulfi out of it onto a leaf – I don't know what kind of leaf this was, but I'm sure my dad could remind me. He would then use his long knife to quickly cut up the kulfi into bite-sized pieces and hand it over into your eager hands, just as its edges started to melt in the summer heat.

Now, I'm very aware that we generally tend to romanticize memories of our past, but looking back on these memories, I still think that life doesn't really get better than treasured moments of eating ice-cream in the summer's heat! On this note, here's my recipe for making a kulfi-like ice-cream in a home ice-cream maker. You could also freeze this in popsicle-molds for a more authentic kulfi. Enjoy.

Kulfi

Ingredients

  • 1/2 gallon milk, plus 6 T warm milk -- I use skim milk, but you can use 2% or whole fat for a creamier taste
  • 1 can of condensed milk, plus more sugar to taste
  • 1/2 teaspoon ground green cardamom seeds1/4 cup coarsely ground pistachios or almonds (optional)
  • A few strands of saffron

Method


  • Place the saffron in 2T warm milk to extract the saffron flavor.
  • Dissolve corn starch in 4 T warm milk and set aside.Place the remaining milk in heavy wok or double boiler and bring to boil over medium-high heat, stirring continuously.
  • Reduce the heat and continue stirring and boiling until the milk is reduced a bit.
  • Using a method used in making Sicilian gelato, I next add the cornstarch mixture to the boiling milk and continue boiling for ~10 minutes, or until the mixture is thickened. This step cuts down the time needed to make kulfi considerably, and also lets me use skim milk in the recipe. However, the correct way of making kulfi would be to allow the milk to boil down to ~1/4 of its original volume.
  • Add the saffron. Taste the mixture, and add more sugar if you think you need it. Remember that foods taste sweeter when they are warm than when they are cooled.
  • Freeze in ice-cream maker according to instructions, or transfer to popsicle molds (or ice-cube trays) and freeze for at least 4 hours. (If using this latter freezing methods, dip your mold in hot water for about 5 seconds before attempting to free the kulfi.)
To serve, garnish with chopped nuts and a smile.


Wednesday, May 4, 2011

Almond Pear Tart

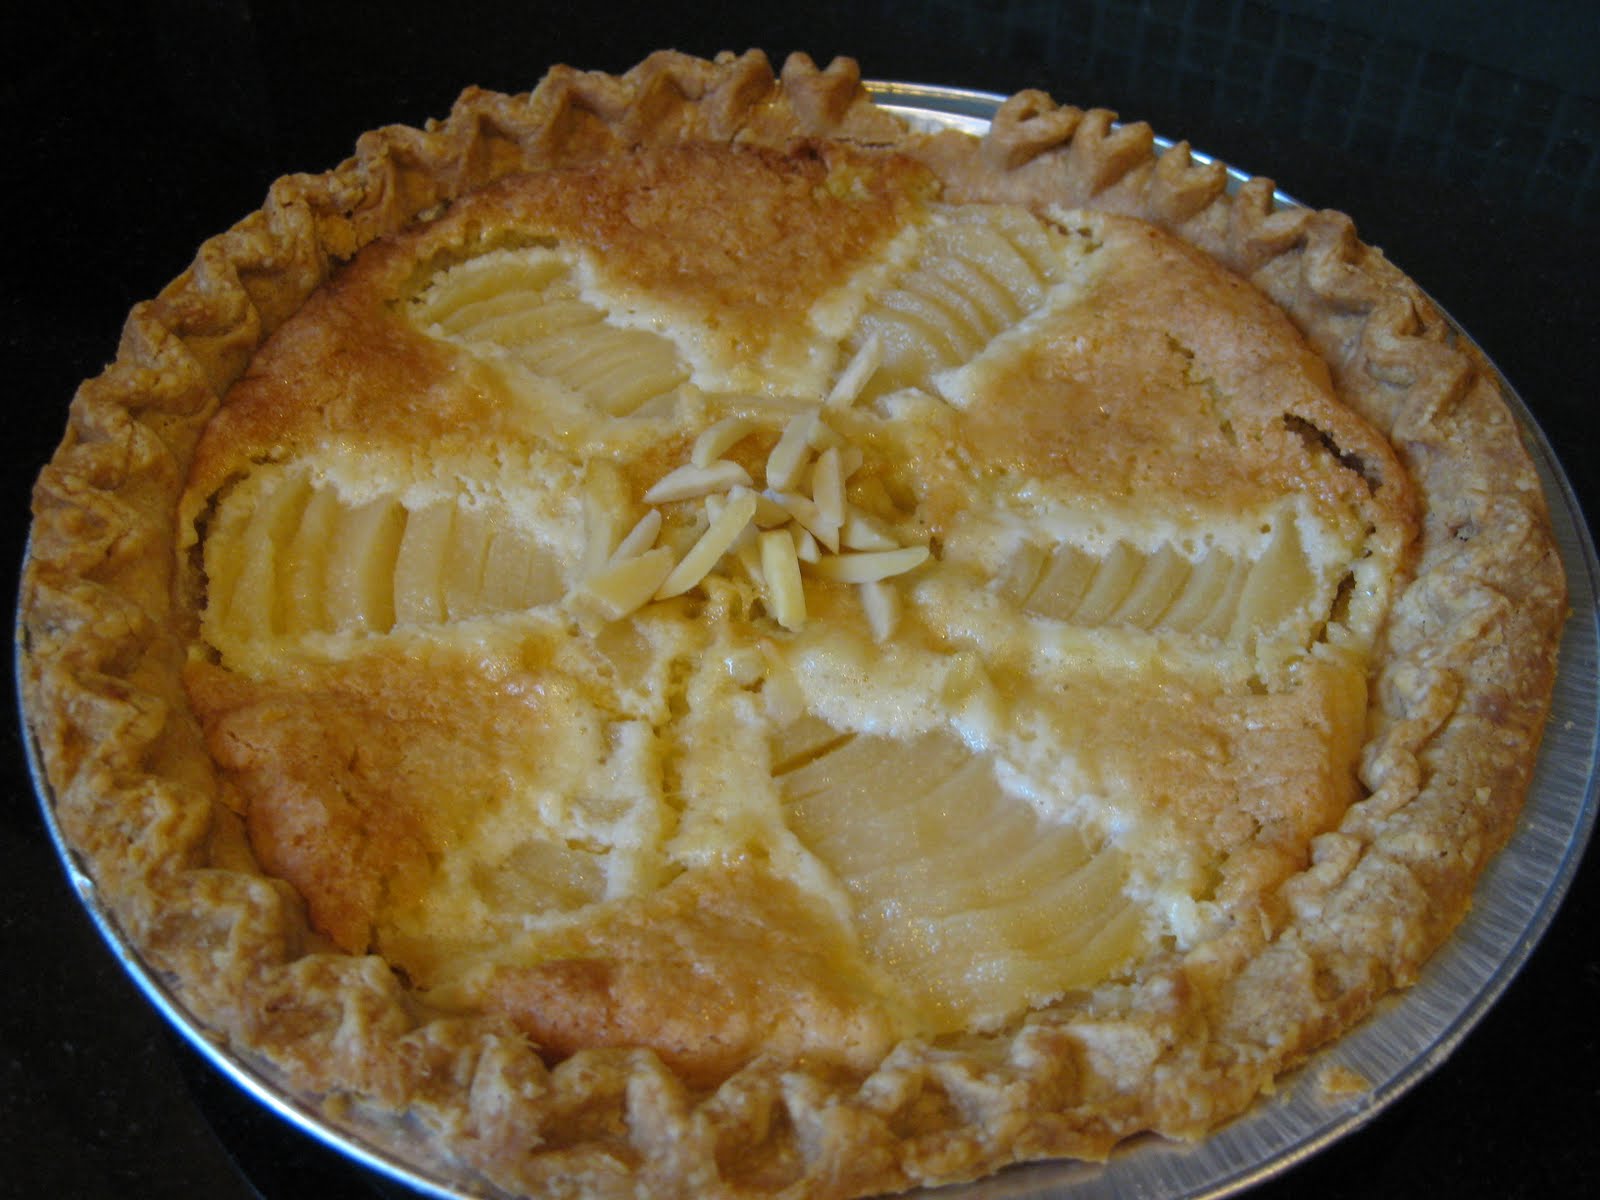
Growing up, did you ever come across words that you did not know the meaning of but that sounded absolutely magical? I certainly did! When I think back, many of these words were centered around food, generally consumed by one of Enid Blyton's heroines at 'clandestine' midnight pool parties...words like 'scones' or 'crumpets' or 'heather'. (I realize now that heather has nothing to do with food, but I still think it sounds magical.) Frangipane, the main ingredient of this recipe, is another such word. Don't you think it just sounds so delectable; I almost like the word more than I like frangipane itself. Frangipane is a pastry filling that is made or flavored with almonds. The filling in this almond pear tart is both made with and flavored with almonds. I first found this recipe on one of my favorite food sites, Epicurious, and owing to its simplicity and understated elegance, I have made it countless numbers of times without modifications. Yesterday, I decided late in the day (and I mean really late) to bring this recipe to a work gathering the following day, having forgotten that one of my colleagues is allergic to dairy. As I had purchased all the other ingredients for this tart already, I decided to just modify the recipe to include non-dairy margarine instead of butter in the filling. Also, it being a weekday, I decided to cheat a little and buy a pre-made pie-crust instead of making the one listed in the recipe (which happens to be quite good). It turns out that frozen pie crusts contain either lard (yuck!) or vegetable shortening (yay!), so having them be dairy-free was not a problem. Additionally, they were sold in sets of two, so I made one tart using butter in the filling and another one with margarine. The consensus from most tasters, who admittedly were not blinded to the identities of the tarts, was that the butter one was slightly creamier, but that both versions were equally 'scrumptious'!

Recipe for Almond Pear Tart

For the pears:

Simmer 3 firm but ripe peeled pears in 4 C of water with 1 C sugar and 2 T lemon juice. When softened, cut in half, discard stem and core, and slice pears crosswise into thin sections. Flatten them slightly with the side of your knife to fan the slices out ever so slightly.

(Cook's Note: You can also simplify your life, as I always try to do, and use canned pear halves in pear juice – you will need 1 can per tart.)

For the crust:

  • 1/2 cup powdered sugar
  • 1/4 cup blanched slivered almonds
  • 1/4 teaspoon salt
  • 9 tablespoons (1 stick plus 1 tablespoon) unsalted butter (or vegetable shortening such as margarine), room temperature
  • 1 large egg yolk
  • 1 1/4 cups all purpose flour

Blend powdered sugar, almonds, and salt in processor until nuts are finely ground. Add butter and blend until smooth, scraping down sides of bowl occasionally. Mix in egg yolk. Add flour. Using on/off turns, blend until dough comes together in clumps. Gather dough into ball; flatten into disk. Wrap in plastic and chill at least 3 hours or upto 2 days.

(Cook's note: I don't actually own a food processor, so I generally blend the nuts in a Mr.Coffee coffee grinder which works great as a nut grinder. I then mix in the butter and egg yolk using a pair of electric beaters and mix in the flour gently by hand.)

Blind-baking the crust: Position rack in center of oven and preheat to 375°F. Roll out chilled dough on floured sheet of parchment paper to 12-inch round, lifting and turning dough occasionally to free from paper. Using paper as aid, turn dough into 9-inch-diameter tart pan with removable bottom; peel off paper. Seal any cracks in dough. Trim overhang to 1/2 inch. Fold overhang in, making double-thick sides. Pierce crust all over with fork. Freeze crust 10 minutes. Blind-bake your pie crust in a heated oven for about 20 minutes until crust is golden brown all over. Let your crust cool at room temperature, while you prepare and chill the filling.

(Cook's note: Since the crust is frozen, it should not be necessary to fill your empty shell with beans or weights during the baking process. If your crust bubbles up during the pre-bake, as mine always does, just smooth it down with the back of a spoon as soon as you remove it from the oven.)

For the almond filling:

  • 2/3 cup blanched slivered almonds
  • 1 tablespoon all purpose flour
  • 7 tablespoons sugar
  • 6 tablespoons (3/4 stick) unsalted butter (or margarine), room temperature
  • 1 large egg
  • 1 tsp. Almond flavoring (optional, but highly recommended)

Finely grind almonds and flour in processor (or nut/coffee grinder). Mix in 7 tablespoons sugar, then butter/margarine, blending until smooth. Mix in egg and flavoring. Transfer filling to medium bowl. Cover and chill for 20 minutes.

(Cook's notes: If you're like me and always cut down the sugar called for in recipes, DON'T on this one -- this is just the right amount. Also, the original recipe calls for a chill time of 3 hours, but I have done this only once. Ever since then, I have cut the chilling time way down, and it appears to make no difference at all. The margarine recipe was slightly softer than the butter recipe after this short chill time of 20 minutes, which makes complete sense when you think about the chemical composition of the two fats. But then again, perhaps not everyone wants this level of detail from a recipe, so I will stop by saying that no more than 20 minutes of chilling is required for a delicious end product.)

Baking the tart: Spoon chilled filling into the cooled crust; arrange the sliced halved pears in a spoke pattern around the tart; fanning them out away from the center slightly; sprinkle a few pieces of almond in the middle of the tart; and bake at 350°F for about 45 minutes or until a knife inserted in the center comes out clean. Remove and cool slightly before attempting to slice.

Serving the tart: This is the most important part of this recipe, in my opinion. Slice the tart in the middle of each "spoke" of pears, so that you have tart slices with pears on either edge of the slice. Serve warm or cold, with or without accompaniments such as whipped cream or vanilla bean ice-cream.